In the last post we discuss on setting up a Windows rig for deep learning. If you still haven’t setup your machine, go do it first: D
After getting the so called big snakes; python and anaconda in the machine, we should have a proper IDE for coding.
There are many good IDEs you can use in Windows environment to code in python. Pycharm, Spyder are some popular tools.
If you familiar with Visual Studio, the so-called father of all IDEs, python works smoothly with VS. There are few configurations need to be done.
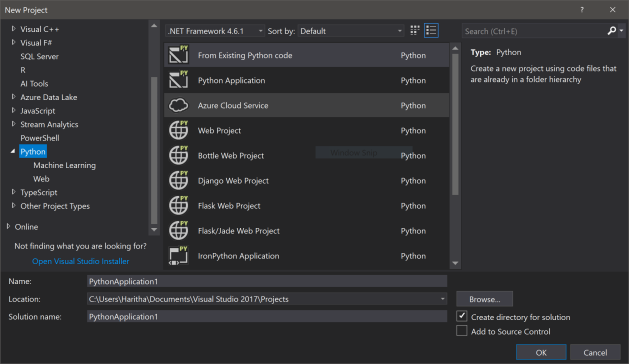 No need to purchase Visual Studio enterprise or ultimate. The freely available Visual Studio Community edition works fine. In 2017 version python comes along side with the default installation options. For the later versions you need to install Python Tools for Visual Studio (PTVS) separately.
https://docs.microsoft.com/en-us/visualstudio/python/python-in-visual-studio
Refer this guide for more details.
The python environments configured to machines can be seen from ‘Python Environments’ pane of Visual Studio. (If it is not there go for Tools -> Python -> Python Environments)

By default, your Anaconda environment and default python environment should be there. First Refresh those environments to support intelliSense and grab the installed libraries for the DB.
For our deep learning experimentations, we configured a separate python environment before. To add that environment for visual studio follow the following steps.
01. Click Custom on ‘Python environments’
02. Go for anaconda environments and activate your pre-configured environment for deep learning (Mine is tensorflow-gpu)
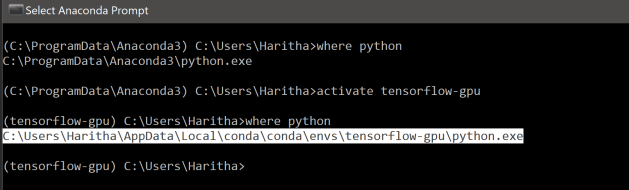
03. Copy the interpreter path of the environment
04. Insert it for the interpreter path and click “auto detect’. Visual Studio will detect the rest

05. Click Apply
It may take few minutes to refresh the packages as well as the intelliSense. Make the configured environment your default and open the interactive. You are good to go 😊
